Plant Training Wire Kits - Wire Plant Supports
Stainless steel espalier kits with everything you need for supporting climbing plants or trees
Stainless steel wire plant support kit allows you to easily form a wide range of ambitious plant training layouts to your own design.
Each kit is supplied with enough components to make one single wire only.


Plant Training Wire Kits
3mm Wire Diameter
| Options | Wire Diameter | Wire Length (metre) |
Wood Screw Thread Eye Bolts | Wire Rope Grips | Hook/Eye Turnbuckles | Code | Price (inc VAT) | Quantity |
|---|---|---|---|---|---|---|---|---|
| 2.5m Plant Training Kit | 3mm | 2.5 | 2 | 4 | 1 | PTK-2.5 | £8.58 | |
| 5m Plant Training Kit | 3mm | 5 | 3 | 4 | 1 | PTK-5 | £11.53 | |
| 7.5m Plant Training Kit | 3mm | 7.5 | 4 | 4 | 1 | PTK-7.5 | £14.34 | |
| 10m Plant Training Kit | 3mm | 10 | 5 | 4 | 1 | PTK-10 | £17.45 | |
| 15m Plant Training Kit | 3mm | 15 | 7 | 4 | 1 | PTK-15 | £23.36 | |
| 20m Plant Training Kit | 3mm | 20 | 9 | 4 | 1 | PTK-20 | £29.28 |
Tip: To view the product code and full product table on mobile please tilt your device to landscape.
Component Sizes: 3mm Ø Wire Rope, 3mm Wire Rope Grips, 6mm x 60mm Wood Thread Eye Bolts, 5mm Hook-Eye Turnbuckles.
Fittings supplied are designed to work together and are manufactured from high quality long lasting stainless steel making it perfect for your garden or any outdoor application.
This versatile system can be used to form a lattice as part of a pergola or canopy -
- For woody vines or plants such as Wisteria
- A green wall system for training of Ivy
- As part of a decorative façade
- Grapevine supports for your vineyard
- An espalier for fruit bearing trees
or for just about any plant support applications you could desire - the only limit is your imagination!

Each Plant Training Kit includes a quantity of the following items:
- 1 x Highly flexible 7x19 wire rope in 316 stainless steel.
- 4 x Easily attachable wire rope grips to form eye loops, in 316 stainless steel.
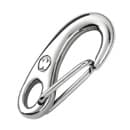
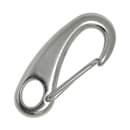
- 1 x Hook-Eye turnbuckle strainer to quickly tension the system in 316 stainless steel.
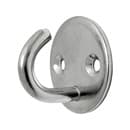
- Robust stainless steel wood thread vine eyes to guide the cable.
- Please Note: Rawl pugs not included.
- Additional components are available individually (see below).

Plant Training Kit Contents:
| Wire Length | Eye Bolts | Rope Grips | Turnbuckle |
| 2.5 metre | 2 | 4 | 1 |
| 5 metre | 3 | 4 | 1 |
| 7.5 metre | 4 | 4 | 1 |
| 10 metre | 5 | 4 | 1 |
| 15 metre | 7 | 4 | 1 |
| 20 metre | 9 | 4 | 1 |
Make your own...
Get creative... You can make your own bespoke plant training wire kit to suit your own design.
Below we have listed all the individual components required, so you can add as many extra supports and end fittings you need.
Tip: For each single wire rope run we recommend using an eye bolt for each end, a minimum of two wire rope grips at each end and a turnbuckle to apply tension.
We recommend you add an extra eye bolt every 2.5 metres for support on very long runs of wire.

Stainless Steel Wire Rope, flexible 7x19 construction.

Eye Bolts with wood screw thread in stainless steel.

Hook - Eye Turnbuckles in stainless steel.

Wire Rope Grips in stainless steel.
Installation Advice
Need some help?Download and print our installation advice sheet for the DIY Plant Training Wire Kit.  |
|
Installation Overview
Preparation
Support wires should be put in place prior to planting.
The wood thread eye bolts or vine eyes - which act as the main wall fixings in this system, are designed to easily screw into any timber surface, although they will also fix perfectly in to masonry with the addition of a plastic plug (not supplied).
Support Eye Bolts should be placed at approximately 2.5metre intervals.
1. Getting Started
It is a good idea to layout your design onto the relevant surface with a pen or chalk. Once fixing points have been marked out, drill pilot holes for the wood screw thread eye bolts.

2. Attach the Eye Bolts
Screw the vine eye bolts onto the mounting surface. Remember if mounting onto masonry use a plastic rawl plug for a secure hold.

3. Thread Wire Rope to Form a Loop
Thread one end of the stainless steel wire through one eye bolt, so that it loops back on itself.
We recommend approx 120mm of turnback.

4. Attach Wire Rope Grips
Secure the wire rope loop by using the wire rope grips.

A: Place the first grip furthest away from the loop.
B: Second grip is placed to create a loop of 45mm.

Unscrew the locking nuts to remove the U shaped bar.
Simply place the live end into the saddle of the body and the U-Bar over the dead end of the wire rope.
Replace locking nuts and tighten evenly using a wrench or spanner.
Tip remember to pass blank wire rope end through supporting eye bolts before adding wire rope tensioner end.
5. Prepare the Turnbuckle
We recommend starting with each end of the turnbuckle half engaged to start with, this is so you can apply tension to the wire rope once fitted. Simply rotate the central strainer body to release the hook and eye ends of the turnbuckle.

6. Attach Wire Rope to the Turnbuckle
Hook the half engaged turnbuckle into the opposite eye bolt.
Thread the dead end of the wire rope through the eye of the turnbuckle and loop back on itself.
We recommend approx 120mm of turnback.
Using a good set of wire cutters, trim the wire to provide neat and tidy finish.

7. Secure Wire Rope with Wire Rope Grips
Repeating step 4 - Secure the wire rope loop to the turnbuckle by using wire rope grips.

8. Apply Tension
To create the wire tension simply rotate the central body of the strainer until you have the required tension. It is important that you do not allow the wire rope to be twisted as you tighten the turnbuckle.

The Essential Partner
Hand Held Wire Cutters for a neat and tidy cut.


 |
Did You knowS3i supplied this product to the family featured in the BBC One series 'DIY SOS: The Big Build' and was used as part of a life changing transformation to the home of a family in Rednal, Birmingham. |
Questions & Answers
Reviews